Although there are no written rules about riders required to know about how to adjust bicycle brakes, for the sake of safe riding and improving the performance of the bike, every cyclist should at least be informed about bike adjustment.
Despite looking quite intimidating and complicated, adjusting a bike’s brakes is quite simple. The adjustments that are usually required to be done by cyclists are the brake pad adjustment and brake cable adjustment. Here we have already listed step by step what you need to know for adjusting your bike.
Reason Why You Want To Adjust Brakes
There are a few reasons why bike owner has to know how to adjust brakes and adjusting the brakes, such as:
- Brake pads/Rotors need a replacement;
- The bike brake starts to squeak;
- To tighten or loosen the brake;
- Stopping the brake from pulling/rubbing;
- To cleanse the brakes;
- Regular maintenance.
It is important to regularly check whether your bike brakes are working properly or not because the brake is one important part that will determine your safety on the road. This is why learning how to adjust the brakes on yourself might come in handy.
Adjust Bicycle Brakes
When it comes to cable-based brakes like the v-brakes and the mechanical disc brake, the main points of adjustment are positioned in:
- V-brake focused on the caliper;
- The mechanical disc brake’s adjustment is located on the barrel adjuster.
To help you—especially new cyclists— recognize the piece. The caliper that is mentioned by Vibrate is a horseshoe-shaped device over the bike’s tire that attaches to the brake pads. As for the mechanical disc brake, the caliper looks like a claw which is located in the center of the bike’s wheel. The barrel adjuster in the mechanical disc brake is a metal cuff on the brake cable.
When to adjust a brake? When riders feel like they need to pull hard on the brake lever to make the bike move slower or stop the bike, it’s a signal from the bike that the cable needs to be adjusted.
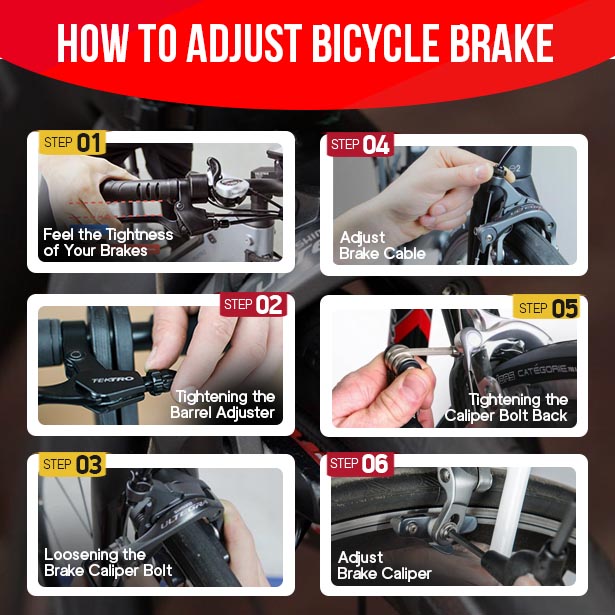
To adjust the bike brake, all you have to do is:
Step 1: Testify the Tightness of Your Brakes
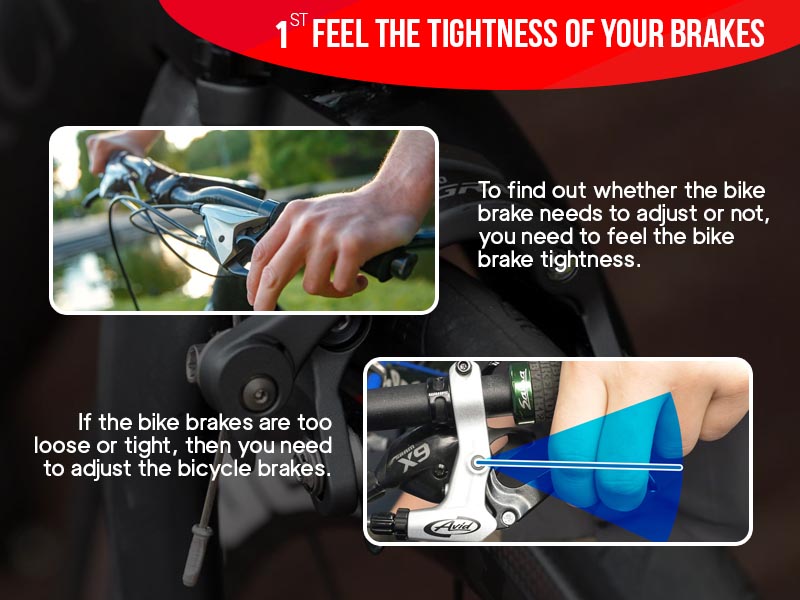
The easiest way to tell if there’s something wrong with your brake lever is when it is too tight or too loose. Have you seen the lever touching your handlebars? If so, that indicates that your brake cable is too loose.
On the other hand, if you can barely squeeze them at all, it indicates that the brake cable has been too tight. An ideal brake lever should squeeze around three to four centimeters before becoming difficult.
Step 2: Tightening the Barrel Adjuster
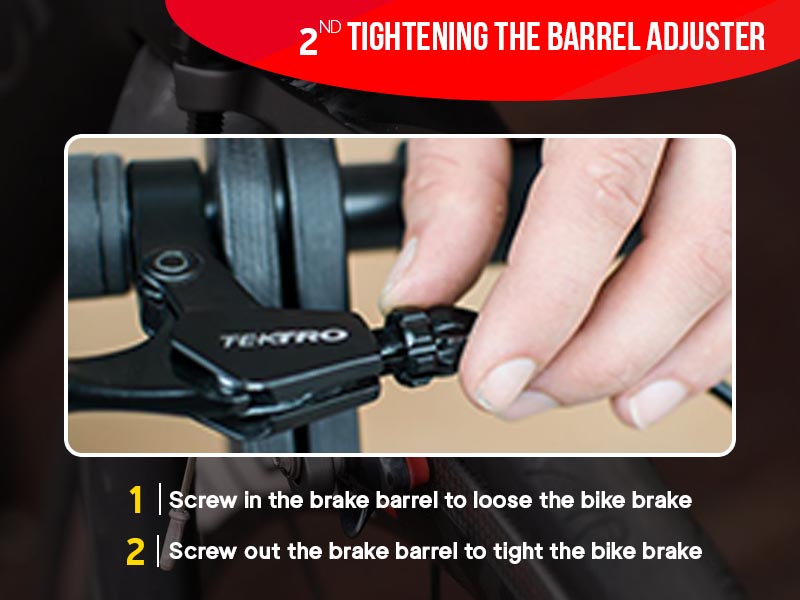
After you have successfully determined whether your cable is too loose or too tight, it’s time to use the barrel adjuster. Tightening or loosening the barrel adjuster is the quicker and easier way to handle the braking issue when you are out for a ride. Although it doesn’t necessarily mean solving the problem, at least, it buys you some time and takes you home safely.
Step 3: Readjust Your Brake by Loosening the Bolt on the Brake Caliper
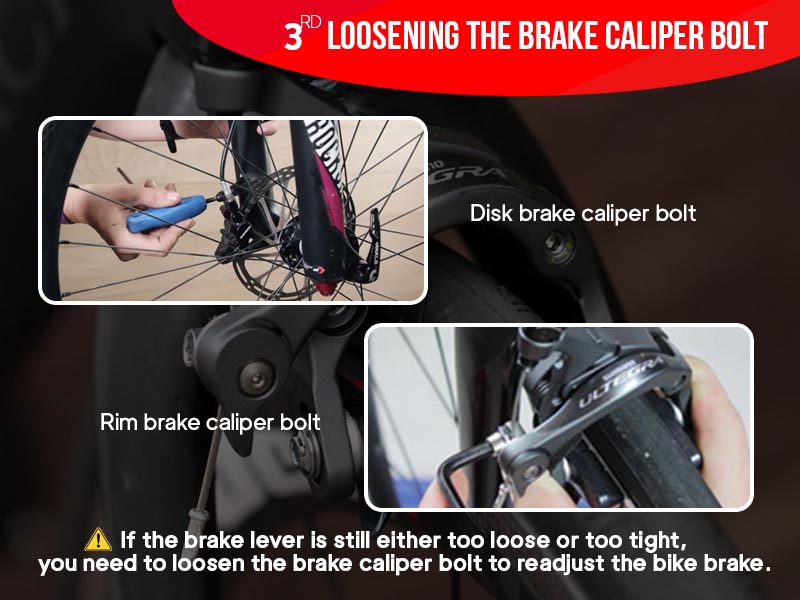
Now if your brake lever is still either too loose or too tight even after correcting the barrel adjuster, you will have to use Allen Key and loosen the cable from the caliper by turning it in the anti-clockwise direction. But be careful to not entirely unbolt the brake caliper or you will have to reassemble the brake which is going to consume a lot of time.
Step 4: Pull or Release the Brake Cable
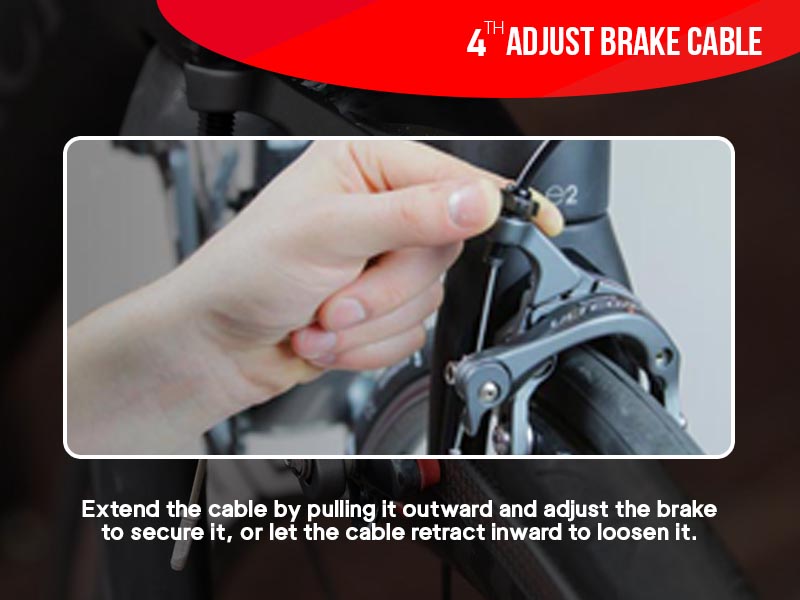
Once you have made sure the caliper is loose enough, you will have to pull the cable outward and tighten the brake or allow the cable to retract inwards to loosen it. Now if your bike is using a v-brake, you will have to make sure the brake pads sit a few millimeters away from the rim and not let the brake pads too close to the rim.
While for disc brake bikes, you should leave enough room for the lever to move when you are tightening the cable so make sure it can’t reach back far enough to hit the caliper, or else, your brake pads won’t be able to reach the rotor as the braking is obstructed.
Step 5: Tightening the Caliper Bolt Back
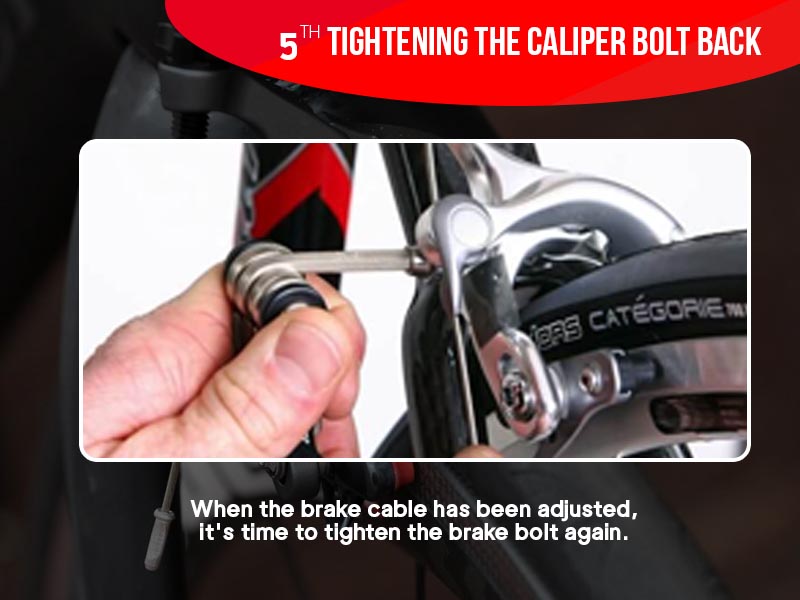
When finding the spot where your brake pads can sit comfortably over the rim where the cable is tight enough, it’s time to screw the caliper bolt back and squeeze the brake. If after this, the brake still is not quite feeling right, revisit your barrel adjuster and tweak it to loosen or tighten the brakes.
Riders had to make sure to lubricate the cable, check the brake pads, and re-clamp the cable to avoid bike brakes not gripping issues.
Step 6: Adjust Brake Caliper
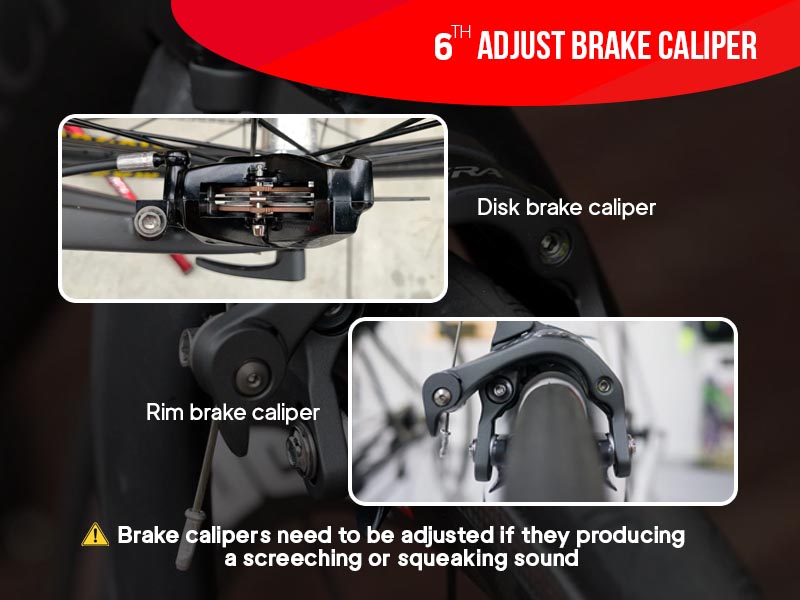
Aside from adjusting the brake cable, you can also adjust your brake caliper, especially the dual-pivot caliper by centering your brakes and observing if the brake pads are sitting at an equal distance from the rim or not. Here is how to do it:
- Check the distance of the pads from the rim by holding the brake caliper in one hand, loosening the bolt holding the cable, and giving the brake caliper a little squeeze. Retighten and secure the cable while testing how the brake feels at the lever;
- Screw the lateral adjustment in then back it about four to five turns;
- Loosen the caliper mounting bolt with the Allen Key;
- Center the brake and re-tighten the mounting bolt firmly;
- Rotate the lateral adjustment screw and balance the pad clearance between both the left and right sides;
- Readjust the total pad clearance with the cable argument nut if necessary.
Step 6a: Adjust V Brake Pads
Talking about how to adjust bike v-brakes, usually comes alongside adjusting the brake cable which we had just listed down on the point above. Now if you get the feeling that your brake is pulling during your ride, producing a screeching or squeaking sound when you apply them, or the brake is uneven on both sides, then it is the right time to either adjust or replace it.
We are going to first choose how to adjust rim brakes—or more like the rim brake pads first. After all, if you can fix it, you will get to save some cash for later upgrades, right? So, here is what you should be doing:
- Check the brake pads;
- Pull the brake levers and see where you should adjust;
- Hold the brake pads in place and loosen the bolts;
- Moving the brake pads into the correct positions;
- Tightening your brake pad bolts.
Step 6b: Adjust Disk Brake Pads
Done with adjusting rim brakes, now it’s time to understand how to adjust bike brakes – disc brakes. A disc brake also has two parts just like a v-brake. The difference is, that a disc brake has a rotor made of a metal disc that is attached at the center of the wheel or the hub.
However, unlike the v-brakes where you can easily notice the worn-out brake pads, you can’t easily notice that on disc brakes thus, it is important to do regular maintenance. Here’s how you do it:
- Stand your bike upside down, let the bike rest on its handlebars and saddle;
- If you see the rotor unevenly spaced inside the brake caliper, adjust the caliper;
- Spin your wheel and observe whether there’s a sign of bent rotors or not.
Now, if your rotor is unevenly spaced inside the brake caliper and you need to adjust it, you will have to:
- Loosen the top and bottom bolts of the caliper with just enough slack in their fittings to avoid them from falling apart;
- Spin the wheel and tightly pull the brake lever and it will grip against the rotor and bring both pads in alignment with one another;
- Release the brake lever and see if it sits inside of the caliper between the brake pads or not by spinning the wheel to ensure the caliper stays in place;
- Readjust if the brake is yet to be spaced equally by loosening back the bolt and repositioning it until they are correct.
Conclusion
Knowing the tips on how to adjust your bike will benefit you to safeguard your bike in the long run. Besides, adjusting bike brakes could improve your riding experience as well. All you have to remember is to always check whether the wheels are sitting correctly in the dropouts or not.
However, if you are too busy to take care of your bike, you can always bring them to Rodalink. Although Rodalink is known to be the official distributor for Polygon bikes, they also have a one-stop cycling shop that will not only help to adjust Polygon bicycle brakes but also help to maintain and repair your bike.
Are you looking for a well-performing bike at an affordable price? You might want to look at Polygon Bicycle or just take a stall at Rodalink. Not only varieties of Polygon road bikes and Polygon mountain bikes, but Rodalink offers a wide range of bikes that will suit both your needs and budget.
Moreover, if you are shopping for a bike from Rodalink, you will have the bike delivered to you in a ready-to-ride form, so you don’t have to assemble it part by part because Rodalink has done it in your favor.
Get their special offers by registering as part of the Rodalink community and gain benefits such as special deals, events, and member points that can be redeemed into shopping vouchers. Happy shopping, happy cycling achieve all of that only at Rodalink!