One simple question, do you know how to adjust brake levers on a mountain bike? When we are doing the brake setup, it is far beyond ensuring the calipers are aligned and the hoses are bled. It is also important to make sure your levers are in the optimal position so you can get more comfort and the levers can perform better.
If you have never adjusted your mountain brake levers before and are unsure of how to do it, that’s alright. It’s not too late to start learning about it now. Here is a simple step-by-step on how to adjust brake levers for you. Check them out.
What are Brake Levers?
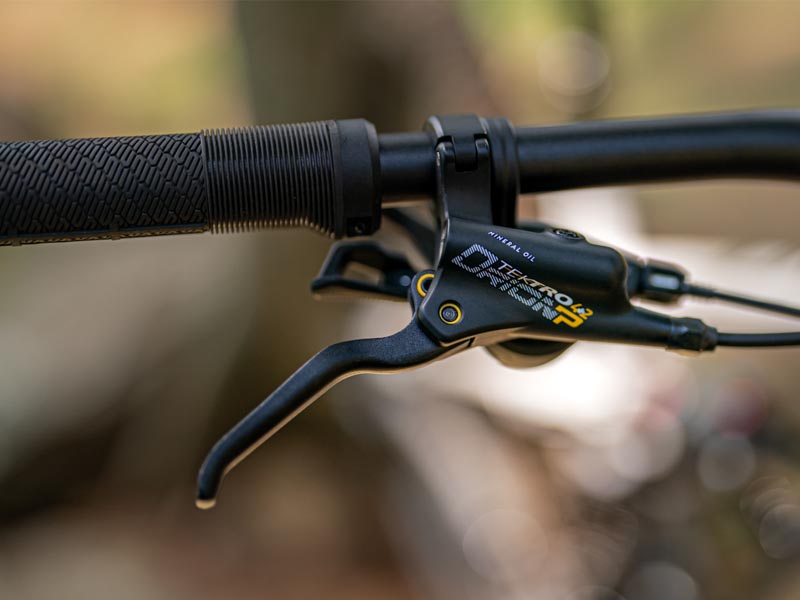
Brake levers are one important part of a bike. Brakes control the speed of a bike and the brake levers are the part/components that actuate the brake. A brake lever is usually mounted on top of a handlebar.
At a glance, the brake levers are divided into:
- Standard-pull levers, work with caliper or cantilever brakes often found on road bikes;
- Long-pull levers, work with v-brakes and cable disc brakes, usually found on mountain bikes;
- Dual-pull levers are usually needed/used by cyclists who ride on BMX or Gyro.
Incorrect setting of brake levers might decrease the performance of a bike and cause the rider to suffer from wrist pain. However, it is shockingly common for most riders to leave the lever as it is since the first day they bought their bike home.
Adjusting Brake Levers on a Mountain Bike
Each person has different features. The hand size, strength, and reflexes of each cyclist are not similar to one another. Hence, the adjustment for each rider can also differ. But the factors that cause an adjustment of brake levers to become optimal remain the same, which is by getting the proper positioning, reach angle, and bite point.
Here is what you should be doing to adjust your brake lever:
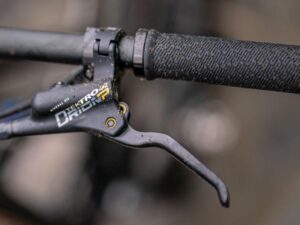
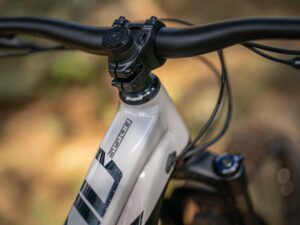
Determine the Right Position for Lever on Bars
Before starting to make adjustments, you will have to find the right position for the lever. Here is the deal, you will have to look for a position where the brakes lever didn’t get too close nor too far from your grip.
The best leverage your finger has should rest at the end portion of the lever and form a straight line with your hands and lower arms.
Find Your Angle
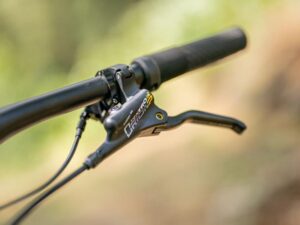
The purpose of this is to have your fingers, palms, and arms able to form a straight line when riding in a descending position. It is important to have this adjusted correctly because it affects the hands and their ability to withstand fatigue during the ride, especially over a long descent.
When speaking about how to tighten bike disc brakes lever, first you will need to find the best angle which you should have adjusted according to your standing position on a bike. The arm angle for riders who prefer a flat position during the ride might be different for riders who prefer a crouching down position.
Normally, the 45-degree angle of horizontal will be a perfect fit for the majority of riders, but if you prefer other angles, it is okay too. Just make sure you are comfortable when pulling the lever and it’s all perfect. To secure the position of your lever, you can tighten the screw using the Allen key.
Fasten the Levers
Once you have found the perfect angle and hand position of the brake lever on the handlebar, it’s time to tighten the levers onto the bar using a torque wrench if you don’t wish to get them secured too tight. Some cyclists prefer to leave their levers a bit loose so they can spin during the crash and not cause too much damage.
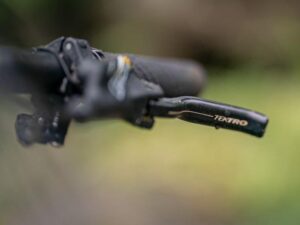
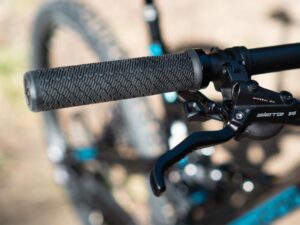
Adjust the Reach
Different brands of brake levers might have different ways to adjust. For example, the Shimano brake lever adjustment for reach can easily be adjusted to fit each rider’s preference without the need of using a tool. The Polygon mountain bike brake levers often use the Shimano braking system so it is easy to adjust.
When you are adjusting this part tho, you will have to make sure the initial joint of your index finger lies onto the lever so the lever will be within your reach anytime. Note that the adjustment screw of the brake lever is usually found at the front.
Adjust Bite Point
Bite points are only present in high-end mountain bike models. The suitable adjustment for this part is up to riders’ personal preferences although ideally, people will want to get this part adjusted until you can generate a maximum power of the brake using your hands.
How to Setup Your Individual Lever Position
Ideally, adjust brake lever travel so that you can create a more relaxed position and prevent your wrist from bending too much. Although some bikes will try to adapt to the pre-set position without ever changing it—which should also be fine if you prefer that way.
But if you want to get the best out of what your current lever can offer to you, here is what you should be doing:
- Slide the brakes inboard until you are set for one-finger braking;
- Put your finger on your brake lever and move the lever up and down so you can have your finger in a straight line with your arms with the lever blade touching under your finger;
- Dial-in the lever reach adjustment until the hook of the lever falls under that first joint in your index finger and your finger is slightly bent.
Conclusion
Getting your brake levers properly set will not only increase your performance and confidence over the bike but also ensure your safety when hitting the off-road trails. Aside from adjusting the brake lever position, you might also want to learn another trick regarding your brakes and lever.
For example, learning how to adjust brake lever tension which is usually done for V-brakes by twisting the barrel adjuster counter-clockwise to have the cable tension tighten. Getting to know why your hydraulic brake lever not springing back and how to inspect and fix it might also be useful so you don’t get into trouble during your off-road riding.
Many said that when you purchase a bike from a direct distributor, the adjustment and assembling are always up to you. By means, you will have to assemble your bike on your own and find out which setup works the best for you. For a beginner, this is a total challenge.
Being the official distributor of Polygon, Rodalink is the only one who will give you full assistance and ensure you get your bike without having to go through much hassle and headache. Besides, at Rodalink, you will not only find the Polygon mountain bike but also a wide range of bike selections from various renowned brands.
No matter what your riding style is and how you will like your bike to be, Rodalink is the answer to your desire. If you are new to the cycling world, worry not because you can find just everything you will need from Rodalink. From bikes to accessories, parts, and even apparels, just tell the employee what you are looking for and they will get it for you.
Besides, you will not have to worry about breaking your bank account because the price range offered by this shop is still affordable. You can also register to become part of the Rodalink community to get special offers and deals. Getting the best experience for your riding journey within a budget is possible with Rodalink.