Indoor training is an option to keep track of your daily workout when the weather outside is not allowing for a nice ride across the park or when your schedule is too packed up. If it is your first time investing in indoor training equipment and you don’t know how to attach bike to trainer, don’t get panicked.
In this article, we will list each step of what you should do to attach your bike to the trainer and tips for a better bike trainer setup that you will need so you can exchange your indoor training experience. So, keep on scrolling through, and wish you have an excellent reading!
What is a Bike Trainer?
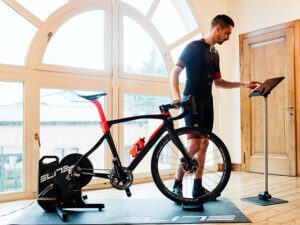
A bike trainer is equipment that allows riders to ride their bike without leaving the comfort of their house. For athletes, it is common for them to use a bike trainer for warm-up practice before the race. For casual riders, bike trainers help them improve their cycling skills efficiently in a highly controlled environment.
Bike trainers are categorized by the resistance it provides. The board categories of bike trainers are:
Wheel-On
The wheel-on bike trainers are one of the turbo trainer types attached to the bike’s rear wheel and are one of the most affordable options for indoor training. There are three types of bike trainers:
- Magnetic, this type uses a magnetic flywheel to create resistance on the bike’s rear wheel;
- Fluid is a type of bike trainer combining the magnetic flywheel with fluid chambers to create resistance;
- Rollers consist of three cylindrical drums that connect through a belt and allow them to rotate beneath the bike’s wheels.
Wheel-Off
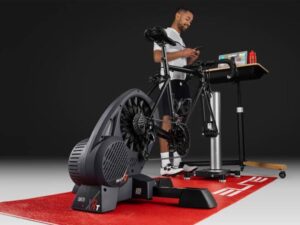
The wheel-off bike trainer is also known as the direct-drive bike trainer. This type of bike trainer directly replaces the rear wheel of the bike instead of being attached to it. The benefit of the direct-drive trainer is it has less tire noise and a lower chance of wearing out the bike tire. It also allows real-life simulation indoor training. Like the wheel-on trainer, this wheel-off or direct-drive bike trainer is widely known as a trainer in the turbo trainer category.
Smart Trainer
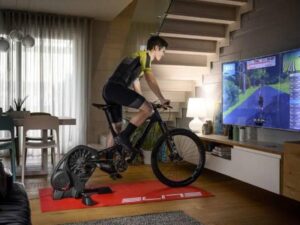
A smart trainer can be either the wheel-on type or the wheel-off type but with a comprehensive simulator with a system linked to virtual world software like Zwift, for example. The system also allows the bike trainer to be linked to the internet and provide additional information such as heart rate, cadence, and many more.
How to Attach a Bike to a Trainer?
After getting the correct bike trainer according to your training goal, the next thing you need to learn is how to install a bike trainer so it can give the best indoor training result and experience.
Usually, each manufacturer will give the indoor bike trainer manual for helping you with the setup. But since you are already here, it might be best to explain how you attach a bike to a trainer. You can follow the followings steps:
- Unfold the bike trainer stand’s legs until they are fully extended;
- If you want to lower the roller, you can turn the adjustment knob counter-clockwise;
- Ensure the roller isn’t in the way of the bicycle tire when you are mounting your bike into the bike trainer;
- Then, you can put the bike onto the trainer, line up the rear wheel hubs with the trainer’s axle cups;
- You will have to check whether the bike has been properly mounted to the trainer, after that, tighten the locking ring on the axle cup so the bike can be secured;
- Once done, raise the roller until it pushes against the rear tire and compresses it at approximately ½ inch;
- After that, place the front wheel in the wheel block to raise the front end of the bike and keep it level as well as prevents the front wheel from turning;
- You can place one hand on the handlebar and another on the seat, move the bike side to side, and if the bike moves, you can re-check to ensure the rear wheel has been positioned securely on the axle cups then retighten it;
- Last but not least, mount the bike and pedal at a slow pace for two minutes to confirm that the bike has been securely mounted to the trainer.
Tips for a Better Trainer Setup
Even when you have already bought the best indoor bike trainer stand, if you don’t set them up correctly, it still couldn’t give you the best experience you need. Here are a few tips you might want to follow:
Choose a Bike that Fits Properly

The best indoor bike trainer is one that perfectly fits its riders. Since riding an indoor bike will not require you to move around on the bike as much as when you are riding outdoors, therefore, you should be paying more attention to the saddle height, handlebar width, brake positions, and bike reach.
You can read our article regarding how to adjust your bike according to your need or go to the professional cycling shop to help you adjust your bike to fit your figure perfectly. If you choose to let the professional help you adjust your bike, you can go to Rodalink. They have a one-stop cycling shop with a professional team who will gladly help you out.
Protect Your Bike
It is not a surprise that when you are doing indoor training, you will tend to produce more sweats than during outdoor rides. Aside from wearing tire, sweats corrosion can be one of the factors that cause damage to your bike trainer. Sweats can build up under the handlebar tape of your bike and if you don’t take care of it, sooner or later, you might break the handlebar.
To prevent this from happening, you can put a towel on top of your handlebar as you ride to prevent excessively build-up sweats underneath. Or, you might want to consider purchase on sweat shield accessories,
Another thing to pay attention to is the rate of the tire wearing out when used for indoor training. For riders who use wheel-on trainers, you might want to use the skewer that comes along with your bike instead of those that come in a pack with your bike.
If you want to make sure your wheel especially the rear one doesn’t wear out super fast, you might want to spare your wheel and change it with a trainer-specific wheel and tire and a sturdy cassette for a quick swap and adjustment before starting your indoor training journal.
Stay Hydrated and Well Fed

As we have mentioned before, indoor training can cause you to sweat more than riding outdoor. To keep the best performance in your indoor training, you will need to stay hydrated and energized, hence, you need to ensure the food and water are always within a hand’s reach so you can stay fueled.
Conclusion
Each type of bike trainer will come with a manual book that helps you to find balance from bike trainer assembly instructions. You might also want to spend some cash on getting a bike trainer accessory to protect your bike and floor from damage caused by sweats produced.
Looking for a bike trainer that is easy to set up and budget-friendly but still offers a high-performing mechanism? You might want to visit Rodalink and consider purchasing the Polygon bike trainer as your trusted indoor training equipment.
If you don’t know which to choose, here is your Polygon bike trainer manual guidance:
- If you are looking for classic trainers, there is Elite Novo Force—the magnetic wheel-on bike trainer which offers 8 magnetic resistance levels and is compatible for 24″ wheel bikes to 29″ wheel bikes;
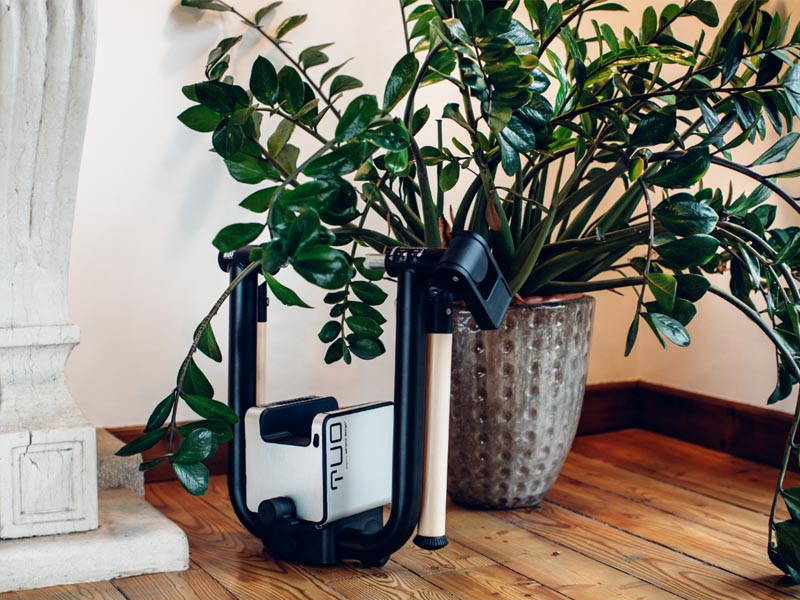
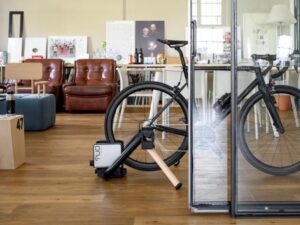
- If you want an interactive wheel-on bike trainer, you can consider getting the Elite Tuo which comes with a compact and stable frame design, fast locking system, calculated power accuracy reading of +/-5%, and is compatible with 26″ to 29″ wheels;
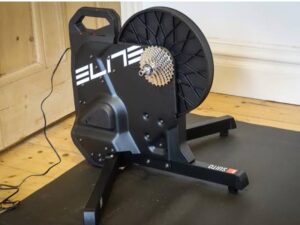
- Wish to get an interactive direct-drive bike trainer? The Elite Directo XR-T and Elite Suito-T might be your best deal. Both types include a riser block to help keep your bike stable, extremely compact (Suito-T), and fully assembled “Plug and Play” (Suito T and Directo XR-T).
Rodalink is the official distributor of Polygon bikes that also offers a wide range of bikes, accessories, parts, and apparels selection from the world’s renowned brands. You will guarantee to get only the original item if you purchase from Rodalink.
Not only that, you can be granted free shipping by purchasing non-bike items for SG$200 or above. If you become part of Rodalink community members, you get special deals and are eligible to join various events that are exclusively tailored for Rodalink’s members only. There’s no other shop that will offer you lots of benefits like Rodalink.
So, come and visit their offline store at Jurong East and East Cost or if you are super busy, you can always purchase through their online store that you can access 24/7. When riding outdoor sounds impossible for various reason, indoor training become your helpful solution and Rodalink is more than happy to assist you in finding the best indoor bike trainer.