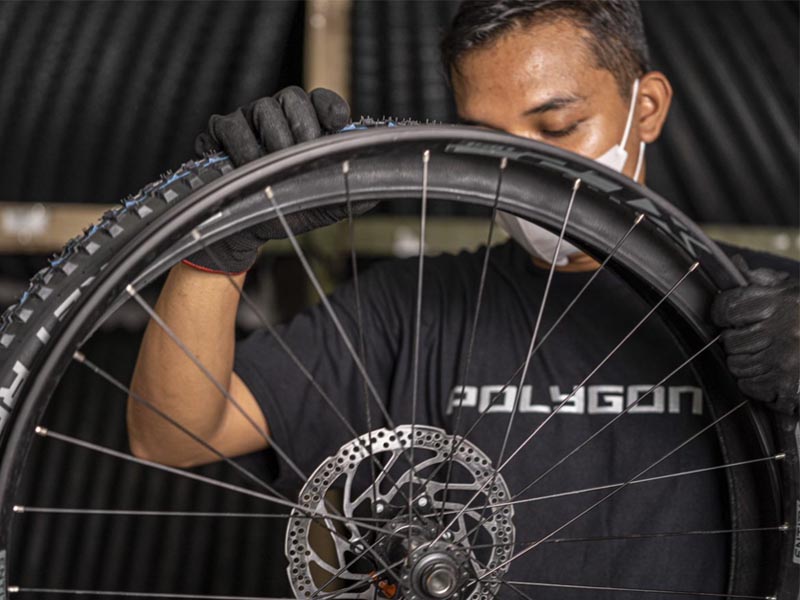
Getting a flat tire in the middle of your outdoor ride is something riders don’t wish to happen, yet it is an inevitable event you are likely to experience at least once during your ride. Hence, every rider needs to know how to change a bike tire to get back on the wheel faster.
If you are entirely new to the cycling world and clueless about how to save yourself from a flat tire, don’t worry, because as the title suggests, today we will be giving you step by steps on how to easily change your bike tire so, make sure you are not skipping this article and have an enjoyable reading!
How to Change a Bike Tire
Usual flats might seem easy to deal with since, most of the time, riders are only required to replace the tube inside the tire, and the wheel is set back for a ride. However, if the tire is badly worn out and severely damaged, replacing it with the new one is necessary.
Typically, riders are required to carry a spare tube, tire levers, repair kit, and bike pump or CO2 inflator as one of the essential cycling gear. Then, it would be best if riders could remember the five basic steps to help them fix a flat bike tire, such:
- Removing the bike wheel;
- Removing the tube;
- Looking for the culprit behind the flat tires;
- Patching or replacing the tube;
- Reinstalling the bike wheel.
How to Remove a Bike Tire
Before changing your old worn-out tire, you must remove it first. Here are the few steps you must follow:
Remove the Wheel

When removing the wheel from your bike, you can choose to carefully put your bike upside down where the chain is facing up. But if you were afraid you might damage your handlebar or saddle by doing so, consider getting a bike stand to easily position your bike off the ground while you are working on its maintenance.
After getting your bike in a more comfortable position, it’s time to work with the tire. If you are removing the back tire, you will have to adjust your gear into smaller rings to make it easier to remove the gear.
Now, if your bike is using a V-brake, you can squeeze the brake arms together to ease the tension and then release the cable. If your bike includes a quick-release lever, it can usually be found at the center of your bike wheel. Pull up and turn the lever 180 degrees to loosen and remove it.
Once done, you can put the wheel aside for reinstallation. If your bike doesn’t come with a quick-release lever, though, you might have to use the 15mm wrench so you can loosen the nut that is placed in the middle of your wheel.
If you are not sure of what you are doing, you can check the bicycle manual about how to remove your specific bike tire. And if your nuts have been seized, try to use a lubricant that helps loosen the threads and remove the nuts.
After that, push the rear derailleur back so that the chain lifts away from the cog, then use your other hand to remove the wheel from the dropouts on the bike frame. For riders who are using disc brakes instead of rim brakes, you must be wondering about how to change a bike tire with disc brakes.
If you have a disc brake, you don’t need to release the brakes. However, you must be careful not to touch the rotor when opening the quick-release mechanism to avoid getting your hands burned, and pay attention to not getting the oil contaminants on your disc brakes so it won’t lose its braking power.
Remove the Old Tire and Tube

The next step is to remove your old worn-out tire and tube by completely deflating it. You will have to loosen the cap on the air valve and set the cap aside once it has completely come off. You will have to release the air in different ways depending on the type of your air valve, for example:
- If your bike is using the wide Schrader valve that is commonly seen on a car, you might have to use a wrench to press down on the small pin in the center of your tire valve to release the air;
- If your bike has the thinner Presta valve, you can remove the plastic dust cap, unscrew the small valve by turning it in a counterclockwise direction before pressing it down to release air;
- Lastly, if your bike uses the Dunlop valve, you must take off the cap before pulling up on the air valve to release the air.
Once you have successfully deflated the tire, the next thing you should do is unseat the bead tire with the following steps:
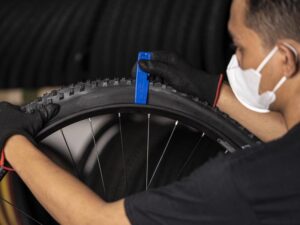
- Push the bead edge towards the rim’s center and then work your way around the rim. Move the tire’s bead up and over the outside edge of the rim. This is how to change a bike tire without tools. But if you wish to have an easier job, you can use the tire lever when unseating the bead tire;
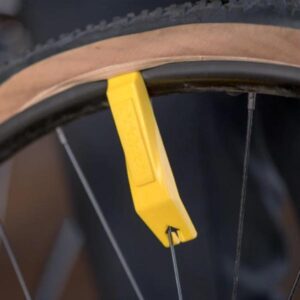
- If you have tire levers, you can use them for additional leverage. You can start on the section of your tire opposite the valve to avoid damaging the valve’s stem. Use the longer end of the tire lever to pry the bead of the tire up and over the edge of the rim;
- In case one tire lever is not offering much help to unseat your tire beads, you can place another tire lever with about two or three spokes on either side of the first one. Look at the picture attached below for a visualization of how you should be doing it:

- Once the section of the tire bead is free, you will only need to take out the rest with your fingers. Pull the valve stem out through the rim to remove the inflatable tube from beneath but make sure to be careful when doing so to avoid damaging the valve on the sharp edge of the rim.
After the inner tube is pulled out, you can remove the tire from the wheel by rolling or twisting the tire over the rim edge with your hands. Again, if your tire is badly worn-out and damaged, you will have to replace the entire tire for safety purposes.
Reason Why Some Bike Tires are Hard to Install
Now you have already known the steps of how to change a mountain bike tire—or, more likely, a bike tire in general. However, some cyclists might find it challenging to get the new tire to fit into the rim and wonder what caused this situation to happen and look for a solution to solve it.
The thing is, the modern bike wheel and tire are sized according to the ISO standard 5775, which has been set by the European Tire and Rim Technical Organization or known as the ETRTO. For example, the 28-622 sized tire code indicates the tire has a 28mm width and 622mm inner bead diameters. Converting this size to the old sizing system, people know it as the 700c wheel like found in Polygon road bikes, the Polygon Strattos S3.
Then again, different types of rims and tires made by different manufacturers might be one of the reasons why some bike tires are more challenging to install than others. Here are a few scenarios of why some bike tires are seemingly harder to install:
- The tire construction: a tire casing with stiffer beads like found in Polygon mountain bikes is more challenging to install on any given rim. Hence, most cyclists might find a road bike tire is easier to install than a mountain bike tire;
- The shape and size of the rim play a significant role in installing a new bike tire. Usually, the modern wide and tubeless-ready rims that feature deep central channels will make it easier for cyclists to install new tires;
- Different variations in the manufacturing process may cause some product dimensions to fall within a degree of acceptable tolerance. In this case, some wheels may be a few millimeters larger than specified, causing the tire to be undersized.
The best tip to handle this causality is by practicing how to change a bike tire while making yourself familiar with the proper technique to make it easier for you to deal with a flat tire outside without having to search for “bike tire replacement near me” on the internet.
Conclusion

In case you are looking for how to change a Polygon bike tire tip, you can as well follow the step by step above. After removing the old tire from your wheel, all you need to do is install the new tire and inflate it according to the recommended PSI by the manufacturer.
However, if you are afraid to damage your bike’s wheel or mess up your bike when trying to change the tire on your own, it is always recommended to take your bike to the nearby workshop and have them assist you in tire replacement.
Were you looking for a trustworthy bike workshop to handle your flat or damaged tire? Rodalink has a one-stop cycling shop where you can get professional assistance to maintain your bike. There, you can directly replace your tire with the new and original one if needed since Rodalink is the official distributor of Polygon bikes that also offers a wide range of bicycles, accessories, parts, and apparel from the world’s renowned brands.
You can also register to be part of the Rodalink community member for free to get the special service fee. Aside from that, you will also get the latest updates on new deals, events, and new arrivals, as well as earn points for every purchase, which can be redeemed into a purchase discount. So what are you waiting for? Entrust your cycling needs and get the best service with the best deal only at Rodalink.