Mountain biking is a fun sport for riders who love challenges. However, riding a mountain bike can be troublesome if you don’t know some survival basics, such as how to change a mountain bike tire with disc brakes. Because when riding off-road, riders will be more likely to bump into an unexpected problem.
It is a good thing if you are riding in groups and your friends can offer the help you need. Regardless, you are expected to understand simple repairing skills so you can at least get back on your wheel until you can find a bike workshop that could provide more professional repair and services. So, how to remove bike wheel with hydraulic brakes to get the tire changed? Get your answer through this article.
Type of Mountain Bike Flat Tire
Every cyclist knows tires and tubes are the most common bike part to wear and tear. Typically there are four bike flats to differentiate so riders can determine whether the tire is to be replaced or repaired. The four types of bike flats are:
Slow Leak
Your bike tire decreases the amount of air but at a slow pace. When you get a small leak, usually the air inside the tire can stay for around two weeks to a month-long before it goes flat entirely. A slow leak can be caused by a bent valve, wrong sizing of the tube, as well as usage of tires that are made of rubber material with a short lifespan.
Although it can still be ridden, you will need to pump it more frequently than a regular tire. Typically, you won’t spot the hole from a small leak easily. Instead, you will need to put the tube in a pond of water so you can spot the hole.
Blowout

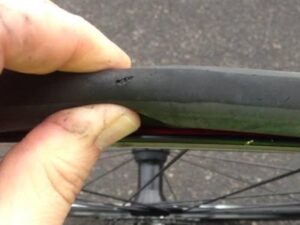
A blowout tire can be caused by an overpressured tire, a weak bead that surrounds the tire, or when the tread of your tire goes flat. Blowout is usually followed by a loud popping sound and could be dangerous if it happens during your ride.
Unlike the slow leak, you can easily spot a big hole on your tire after a blowout, but considering the safety manual, please change your bike tire when you spot the tread of your bike already flattening and avoid inflating your bike exceeding the maximum PSI printed on the tire sidewall.
Punctures
We think almost every rider worldwide should have experienced a punctured tire. It has been the most common case to happen to a bike tire and tube. A puncture is characterized by an inner tube cut through by a sharp object on the ground and causing a small hole into the tire. When this happens to your bike tire, you usually only need to change the inner tube, and your bike will be ready for a ride again.
Pinch Cuts/ Snake Bite
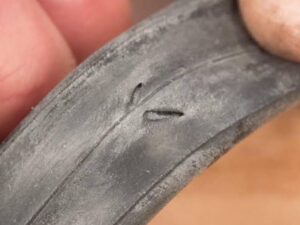
A pinch cut is also the most common case on a rider because the wheel runs through a small hole or sharp edge, creating tremendous pressure to the hitting point and resulting in pinch cuts. Worn out tire can also cause a pinch cut to the tire as it squeezes the inner tube between the rim and the ground. Pinch cut can be solved by changing the bike’s inner tube.
How to Remove a Tire with Disc Brakes
Getting into our main topic, here you will get the step by step on how to remove the tire of a disc brakes bike wheel, as most mountain bikes are equipped with a disc braking system to help them get more responsive, powerful, and smooth braking.
To remove the tire with disc brakes, you will need to understand whether the disc brakes on your bike are mechanical or hydraulic. The difference between both comes from how a lever force is transferred to the caliper around the brake disc rotor.
Mechanical disc brakes will have a cable that operates the braking system, while the hydraulic disc brakes use a sealed, fluid-filled system to apply pressure that forces the fluid to move into the caliper and press the pads against the disc.
For mechanical disc brakes, when removing the tire, you will only need to open the quick-release and remove the wheel without worrying about anything else. But if you are using the hydraulic disc brakes, you have to be careful not to squeeze the brake lever in case the wheel is not in place in the bike’s caliper.
The brake lever in hydraulic disc brakes has an auto-adjusting caliper that might wear the valve. Without the disc rotor in place, the valve will adjust as if you just wore through 3mm of the thickness of a rotor whenever you accidentally squeeze the brake lever.
You must now wonder about how to remove front wheel on bike with disc brakes and no quick release. You will have to check whether your front wheel hub has a nut on either side or not. Then, put the wheel wrench on the bolts and rotate the nuts counterclockwise to slacken them. Remove the wheel once the nut is loose. Still, remember not to squeeze the brake lever when removing the tire if your bike uses hydraulic brakes.
How to Change Mountain Bike Tire With Disc Brakes
Since getting flat tires is inevitable, it will be best if you know how to handle them on your own. After all, getting stranded on a mountain biking trail while wishing another rider would pass by and help you out is not the best scenery. For riders who have never worked on their bicycle before, here is step by step on how to change a rear bike tire with disc brakes as well as the front wheel:
Prepare the Needed Tool
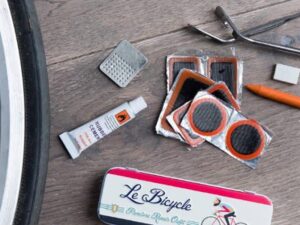
Before we get started, you will have to ensure you get all the needed tools prepared and packed in your backpack before getting on your wheel and going off-road rides. The said tool is:
- New tires and tubes that are compatible with your wheel size;
- Tube patch kit (preferably one without glue for convenience);
- Bike pump;
- Tire levers (optional);
- Gloves (optional).
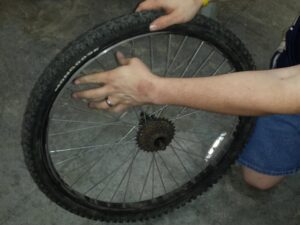
Removing Tire

Whether you are going to fix the flat with a patch kit or directly change the tire and inner tube to save more time, you will have to start by removing the bike tire, and for easier access, the very first thing you should be doing is get the wheel off the bike frame. Talking about how to loosen bike brakes to remove wheel, initially, there will be two ways, depending on the type of braking system your bike is using.
For riders with disc brakes and thru-axle wheel, you only need to flip the skewer or lever on the bike’s frame near the rear-wheel axle in the opposite direction and be careful not to shift the brake lever during the tire removal.
For the riders with rim brakes, you can squeeze the curved aluminum cable attached to the brake lines and the caliper together until it separates off the wheel. Now once you have taken care of your brakes, here is how to remove the front wheel disc brake:
- Gently hold bicycle frame off the ground;
- Pull the wheel off the frame.
While doing so, you only need to ensure that you do not accidentally shift the brake lever when removing the wheel from the bike frame to avoid the auto-adjusting pads. And if you are looking for a tutorial on how to remove the rear bike wheel with disc brakes, you will only need to shift the groupset into the smaller cog before holding the bike frame off the ground and gently pulling the wheel off the frame.
Patching the Tube
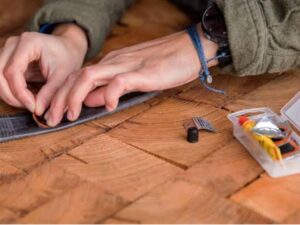
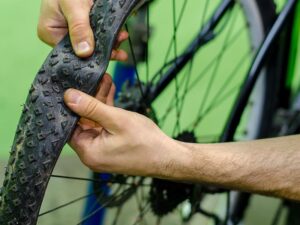
Once you have removed the wheel of the bike frame, you will need to remove the tire so you can patch the damaged tire and tube or directly remove it to a new one. Locate the valve of your tire and if your bike tire uses a Presta valve, remember to unscrew the nut, then pull the tire off the rim with the help of the tire lever.
Once the tire is removed off the rim, pull out the inner tube and locate the leak by pumping the inner tube and using a patch kit to repair the inner tube. But it will also be best to directly change the old inner tube with a new one and use the patch later once you get home safely. After all, locating a leak on the tube requires time, and doing that in the middle of a trail track is a bit odd.
Reassembly of the Bike Tire
Once you have removed the old bike tire and tube with the new one, you must put the wheel back into the frame. Here is how to install disc brakes bike wheel:
- For the front wheel disc brake, you can lift the bike frame slightly off the ground and slide between the forks, and set the frame back onto the tire;
- Slide the skewer back through with the springs back in the direction how they had been taking off;
- With the quick-release lever pushed down, screw the cap at the opposite back.
That’s how to install front wheel on bike with disc brakes, and if you are working on the rear wheel, you might want to follow these steps:
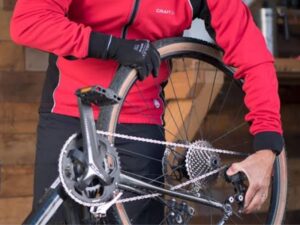
- When reassembling the rear bike wheel with disc brakes, you will need to put the chain back onto the gear and pull back the derailleur;
- Slide the wheel back between forks and replace the skewer while paying close attention to the spring as you must put the springs back into the direction how you put them off;
- While the quick release is being pushed down, screw the cap at the opposite back on;
- Check the tire for a sufficient amount of air inflated inside;
- You are ready to get back on your bike and ride. However, don’t forget to clean up the mess and pick up your trash.
Conclusion

While you can predict an unpleasant event, such as a flat tire in the middle of the ride, you can still prepare for the worst and solve the problem when they occur; learning to change the disc brake mountain bike tire will come in handy. You must only ensure you have packed the necessary tool in your backpack.
If it is your first time in the cycling world and you are unsure which to get for your off-road gearing, you can visit Rodalink at Jurong East or East Coast. Rodalink has a wide range of bike selections as well as bike accessories, parts, and apparels from the world’s renowned brands. Their professional team will gladly assist you and help you find everything you need to complete your cycling journey.
By purchasing at Rodalink, for non-bike item purchases with a value above SG$200, you will be granted a free shipping fee. If you are under tight budget control, then visiting Rodalink should be your best option because, at Rodalink, you will not only find the best product in high-quality and competitive pricing, but you can also buy it now and pay it later by using Shopback as your payment method.
So what are you waiting for? Start your riding journey right away with Rodalink as your assistant.