
Stranded in the middle of a remote area is the last thing any mountain cyclist wants to get when hitting the road. However, we also know that special occasions such as getting a flat tire might happen anytime, especially during a ride in a rough mountain area. Therefore, it is a no-brainer for every cyclist to know how to change a mountain bike tire so at least you can get home safely.
In this article, you will be introduced to various types of mountain bike flat tires as well as how to change your tire when necessary. And while it is possible to replace your tire without a tool, it can be a bit more challenging, so you will also get recommended for a few helpful mountain bike tire removal tools to make your job easier. Hope you enjoy your read, and don’t forget to bookmark this page.
Type of Mountain Bike Flat Tire
Before we start to talk about how to change a mountain bike tire, it will be pretty helpful for you to recognize what type of flat tire you have so you can handle them accordingly. Generally, there are two types of the flat tire, being:
- Puncture: the most common types of flats caused by sharp sticks, rock, thorn, and other sharp objects. Often found in the treads of the tire as a single hole in both tube and tire;
- Pinch flats: often caused by a lower pressure tire that makes the tube gets pinched between the rim and square objects such as a rock, for example. Pinch flats are also known as snake bites since they will cause two holes in the tube like a snake bite mark.
Tools You Need to Change a Mountain Bike Tire
To make your job of removing and changing the mountain bike tire easier, it will be best if you carry these few tools and supplies whenever you are going for outdoor rides. They are:
- Spare tube to help you fix your flat;
- A hand pump or CO2 cartridge is necessary when you want to reinflate your tire;
- Tire levers will allow you to remove the tight tire without hurting your hand.
You might also want to carry tire boots that allow your new tire tube to be inflated without pushing out of the side tire. This tool comes in handy when the sidewall of your tire has been severely compromised. If you are using a tubeless tire, you can consider carrying tire plugs that will help you to plug onto the small holes that the sealant is unable to seal on its own.
How to Change Mountain Bike Tire
Here comes the main topic of this article: how to change mountain bike tires. We will be giving you complete step by step on how to remove bike tire from frame wheel to how to install a new bike tire on your bike when the damage is too extensive for a simple tube replacement.
Removing The Wheel from The Bike
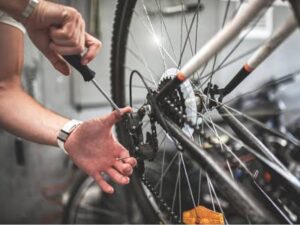
When you have to deal with a flat tire during an outdoor ride, you got no choice but to carefully turn your bike upside down with the seats and handlebar on the ground and the wheel facing up. After that, disengage your brakes to remove the front tire and shift your drivetrain into the smallest cog to remove the rear wheel.
When disengaging brakes, you will have to identify what type of brakes your bike has, as both might have a different way of handling. If your bike uses the V-brake or rims brake, you can squeeze the curved aluminum cable attached to the brake lines and the caliper together until they separate from one another.
Most mountain bikes have been using the disc-braking system as it has a more powerful braking system needed by a mountain biker. If your bike uses a disc-brakes braking system, you must flip the skewer or tire lever on the bike’s frame near the wheel’s axle. Remember not to squeeze your bike lever once your wheel is off to avoid the brake pads being extended too far, causing the reinstallation to be more difficult.
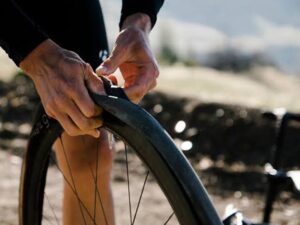
Take Off the Tire from The Rim
First and foremost, you should’ve deflated the remaining air pressure inside your bike so you can easily remove the tire. You need to pinch the tire on one side of the rim to remove the tire bead from the rim. By doing so, you will have room to use your tire lever. Pull one side of the tire over the rim to give access to the flat tube or tubeless sealant.
Removing the Old Tire Tube
Since the valve stem connects to the tube and not the tire, hence it is essential to remove the tire first to be able to pull the entire tube out. You need to locate the valve stem and screw the valve cap, then slide the stem out of the rim’s valve hole and pull out the rest of the tube.
If you are using the tubeless tire, you will only need to take the tire off the rim completely and inspect the inside of the tire’s chamber.
Once you have successfully pulled out the tube, you are required to inspect the exterior to see if there are any pinches, cracks, tears, or any other strange objects. You can also push the tube down into a shallow bucket of water and notice if any bubbles are appearing to check for any leaks that might happen.
Some tips you need to remember about tube replacement as part of the bike maintenance:
- Mostly, a mountain bike should be replaced whenever it has reached around 2,000 to 3,000 miles of rides;
- If debris is found inside the tire chamber and punctures the tube, remove the tire from the rim entirely using the tire levers.
Replacing the Tire and Tube
After removing the old tire and tube, it is time to learn how to put a mountain bike tire back on the wheel and replace the old one. You can follow these steps:
- Line up the stem of the tube valve with the rim’s valve hole;
- Push the tube into the tire using your fingers following the rim;
- Hold back the tire from the rim with one hand and use another to squeeze the tube to its place.
It will be best to avoid using tire levers when you squeeze the tube in to avoid getting a new puncture while you are attempting to insert the tube. After completing this process, you can reinflate your tire using a hand pump or CO2 cartridge. For the tire pressure, you can adjust it according to your riding style and body weight. You might use the pressure gauge to check your bike tire pressure.
Once your bike tire gets inflated back to its shape, you can secure the tire back to the bike frame by lining up the axle into position between the bike frame until you hear the clicking sound. Then, hold the lever in place and screw back the nut on the frame using a wrench.
If your bike is using the rim brakes, you can click the noodle and caliper back together while positioning the brake pads on the rim, and for the disc brakes, you will only need to flip the skewer or lever back down.
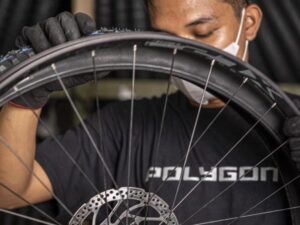
There you go, you have succeeded in learning how to change Polygon mountain bike tires—or, to be exact, mountain bike tires in general. If you are using the tubeless tire, it will reduce the probability of getting flat tires despite you still having to replace them once in a while. Small punctures in the tubeless tire will usually be taken care of by the sealant inside. However, if the sealant doesn’t fix this, you can use a tire plug to fill the small holes.
Conclusions
Getting a flat tire is inevitable, especially when riding on the mountain trail where sharp sticks, rocks, and thorns are everywhere. Hence, mountain cyclists must pack a spare tire and tube and learn to change the bike tire before hitting the road. Also, make sure to recheck the type of tire you bring along, as you can’t change mountain bike tire to road tire mainly for safety purposes.
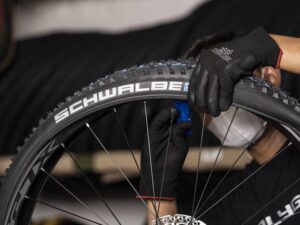
In some cases, cyclists might find some mountain bike tires too tight to fit the wheel. If you are facing this problem, here are tips on how to get a tight mountain bike tire on rim:
- Use your non-dominant hand to clamp on the tire to prevent the end of the tire from creeping out from inside of the rim when installing the other end, then use your dominant hand to push on the tight section little by little;
- Bend down and rest the part of the wheel with the tire section of tire on your knee for better control;
- Use the heel of your dominant hand to put the last section of the tire on instead of your thumb or another finger.
Changing the bike tire might seem complicated initially, but once you have been used to it, you can easily handle it. You might also consider getting a tubeless tire for your mountain bike so it can deal with small punctures and pinch without the need to remove the tire tube.
To prepare yourself for mountain biking, you might want to visit Rodalink. You will find anything essential for your mountain biking gear from the spare tire, levers, hand pump, and many others. You can also get your bike checked and maintained at Rodalink’s one-stop cycling shop to ensure it is in its best condition for a ride.
Is it your first time thinking about mountain cycling, and you still yet to have your first mountain bike? You might want to take a look at the Polygon mountain bike. Polygon bike has been built around the lightweight bike frame and high-quality bike components at an affordable price among any of the other competitors.
So what are you waiting for? Visit Rodalink now and get everything you need to start your biking journey. You will find a wide range selection of bikes, accessories, parts, and apparels at Rodalink and get free shipping services for every non-bike purchase for SG$200 or above. Riding is fun, and Rodalink will be glad to be part of your journey.