As someone completely new to the cycling world, changing a tire may also be a challenge on its own. But that’s okay because everyone most likely has the same problem as a newbie. Here is guidance on how to change a tubeless mountain bike tire to help you out of the beginner phase.
What is a Tubeless Bike Tire?
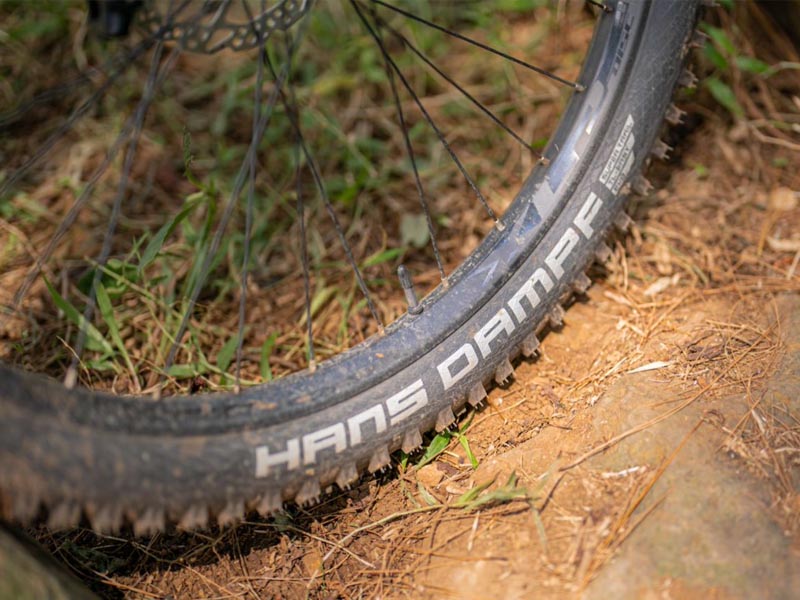
At a glance, the tubeless tire looks just like the standard tube-type clincher tire except a tubeless tire doesn’t require any inner tube to contain air; instead, it will form an airtight seal with the rim once the tire is seated. A tubeless tire is more likely to stay attached to the rim hence, it is safer, especially during a ride over rough terrain.
A tubeless tire is also more resistant to small punctures because, inside a tubeless tire, there will be a sealant that will stay liquid on the tire that will “heal” a puncture suffered during a ride. This is also one of the reasons why a tubeless tire is highly favorable for all kinds of cycling.
Things You Need for Change Tire
Although a tubeless tire often can heal itself from small punctures, that doesn’t make it completely immune from flattening. You might find your tire flatten out after a sudden impact with hard rock or after being stored long enough in your garage. When this happens, don’t get panicked because you can fix it even at home. What you will need to prepare for your mountain bike tubeless tire kit is:
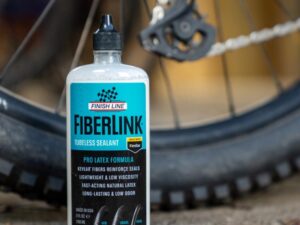
- Sealant;
- Tire Levers;
- Pump or CO2 with a valve;
- Cloth or a rag;
- Tire boot;
- Tire plugs;
- Rim tape.
Tips to Change Tubeless Mountain Bike Tire
If you have your tool prepared, now it’s time to get your tire changed which is pretty simple. Orderly, it’s supposed to be: removing your old tire, installing the tubeless rim tape, adding sealant, and inflating the tire. But for more detailed step by step, please refer to the instructions below:
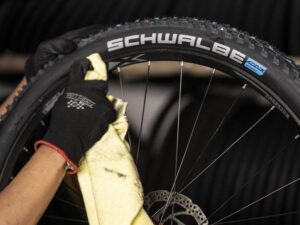
Tire Removal

You will get to work with your tubeless tire removal tool first because we are going to start by removing your current tire. The steps are:
- Deflate your tire and squeeze to remove any pressure on the bead;
- Assume there is sealant inside the tire, keep the valve away from downward positions;
- Push both sides of the tire towards the center of the rim to loosen the bead from against the rim sidewall;
- Use a tire lever to remove the tire from the rim.
Tips: it will be better to use a plastic tire lever so you can avoid damaging your rim especially if you have carbon wheels. If your tubeless tyre stuck to rim, try to remove it by putting the wheel on the ground with the rotor facing up, use a stick or a rock, and place it on top of the tire near the rim (just so it can hold the tire), use your foot to keep the rock or stick on place then pull up the rim to separate it from the tire.
Clean the Rim
After you have successfully removed your old tire, make sure to clean your rim from the sealant crudes by spraying the rim with your cleaner of choice and gently scrub the surface of your rim using an old toothbrush. Once done, you can wipe your rim to dry so it is ready to be installed with a new tire.
Check or Install the Tubeless Tape
Once you have successfully gotten your old tire removed, it’s time to get a new one installed. What you have to do is:
Make sure that the valve is secure in the rim;
- Look for any arrows printed on the sidewalls which indicate the directions of wheel rotation;
- Align the tires with the rim accordingly;
- Install one bead on the rim;
- Install the second bead beginning at the valve while leaving a portion of the bead uninstalled.
Mount the Other Side of Tire to The Rim
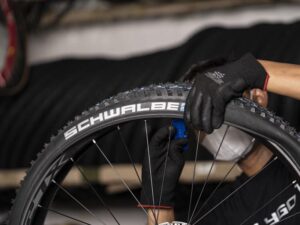
You can use tire levers to fit the other side of the tire to the rim. Carefully hold the wheel vertical while you are fitting the tire to avoid spilling the tire sealant and add more work than necessary.
Inflate the Tire
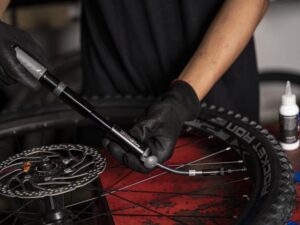
Inflate your tire according to the recommended tire pressure for your bike or based on your ideal tire pressure if you know the exact amount. It is recommended to use the high-pressure pump or an air compressor to inflate the tire since you have to quickly put a large volume of air into the tire so you can force the bead into the rim.
Now comes the question. What if you don’t have a high-pressure pump around? You might want to know tricks on how to inflate tubeless tire with hand pump. If you are using a hand pump, you will have to do a rapid pumping but still, make sure you don’t exceed the maximum tire pressure as printed on the sidewall of the bike.
Another tip about how to inflate tubeless bike tires in case you are having issues pumping them up, you can remove your valve core with a valve core tool.
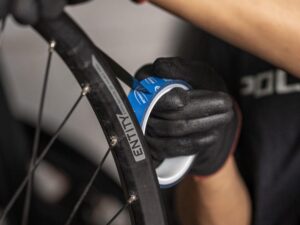
Add Sealant
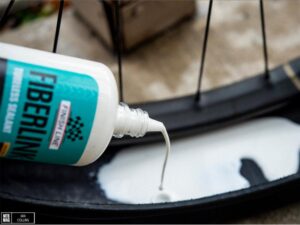
There are two methods for adding the sealant to the tire. For the pouring method, you will have to follow these steps so you can add the sealant:
- Check out the recommended amount of sealant for your tubeless tire;
- Slowly rotate the wheel to keep the fluid at the bottom of the tire while your unmounted bead comes to the top;
- Finish installing the bead.
Note: if you have a tight bead, use soap water and lubricate the bead. You might use the tire lever if needed.
If you are going through the injection method to add the sealant to a tubeless tire, you can follow this step:
- Check out the recommended amount of sealant for your tubeless tire and fill the syringe accordingly;
- Mount both of the tire beads to the rim before adding the sealant;
- Ensure that the valve is secure in the rim before removing the core using valve core remover;
- Inflate the tire fully with an air compressor until the bead is fully seated;
- Pull off the airhead and inject the sealant fluid;
- Install the valve core and secure it.
Note: If your tire is marked with UST, that means you are having a compatible tubeless which about 50ml of sealant will compensate. When inflating a tire marked with UST, you can use the floor pump.
Rotate the Tire
Rotate and gently shake the tire to spread the tubeless sealant around. Once again, remember to keep holding the tire vertically.
Let the Air Out Until You Reach Desired Pressure
Once the bead is seated on the rim, you can let out some extra air so your tire will have the ideal tire pressure that you usually ride on.
Refit to Bike and Check the Pressure
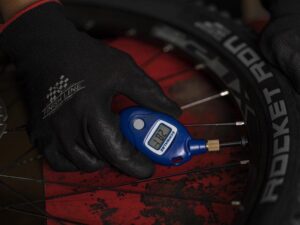
After you refitted your wheel back onto your bike, it’s time to keep an eye on tire pressure and look if there’s any sealant leak. Generally, it is normal to have sealant leaks on the sidewall or bead within the first 12 hours. But if the leaks continue and the tire keep going flat, it may indicate that your tire hasn’t been seated properly. It may also leak from the valve or spoke nipple, so take time to inspect your tire again.
Conclusion
The tubeless tire has become popular in recent years because it helps to ward off the pinch flat and puncture flat. Besides, it helps you to remove some weight off your bike so you can accelerate your speed which is pretty useful for climbing hills or riding on other more technical sections of a mountain bike trail.
Tubeless tires usually work by creating a seal between your tires and rims so you won’t need any inner tube to contain air in your tube. A tubeless tire marked with UST usually doesn’t need any sealant although it is still recommended to have at least 50ml of sealant inserted into your tire.
For the tubeless tire marked as “tubeless ready” like usually found in Polygon mountain bike tubeless tire such as the Xtrada series, you will need to add sealant so it can help to seal the tire and stop the air leaking out of the rubber.
In need of a brand new mountain bike with a high-quality component and built by an advanced tubeless-ready tire? You might want to take a look at the Polygon mountain bike. Visit Rodalink to have the original piece of Polygon bike.
Not only bikes from the Polygon brand, but Rodalink also offers a wide range of bikes, accessories, parts, and even apparel selection from various renowned brands. You can bring home your dream bike without worrying to break your bank account because most of their bike comes in a competitive price offer.
You can even choose to buy now and pay it later by using Shop Back as your payment option where you can get a 0% installment fee. So do not hesitate anymore, it is time to bring home your bike and tackle the rough terrain.