Despite being an accessory of a bike, the handlebar grip plays an important role to ensure your riding is safe and secure. Since it is often overlooked by most bike owners, there are only a few people that know or care about how to change handlebar grips on a mountain bike.
But trust us, you won’t regret learning this little trick of changing your mountain bike handle grips because you will feel another level of comfort during your ride and save you from losing control over your bike due to the slippery grip. So let’s check on this article and enjoy your read.
What is Handlebar Grips?
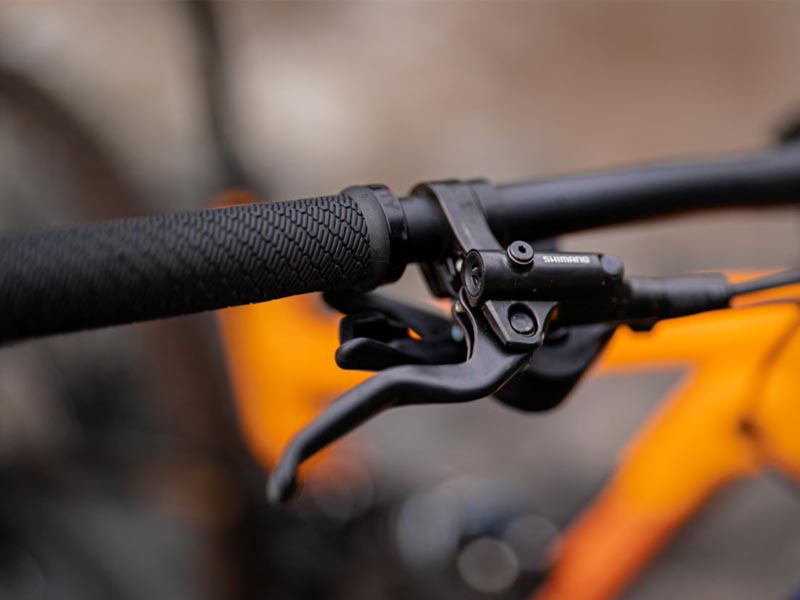
Handlebar grips are an accessory that connects you to the steering control of your bike. The handlebar grip also plays a huge role when it comes to providing comfort during your ride as you can navigate the road without having to worry about getting hand sore.
Frequent contact between your hands and the handlebar grip causes the part tends to wear out faster than any other part of the bike. Since sliding over your mountain bike grips is the last thing you want to happen during your ride because it can make you lose control over the navigation of your bike and lead to a fatal injury, regularly replacing wear-out handle grip is mandatory.
Type of Mountain Bike Grips
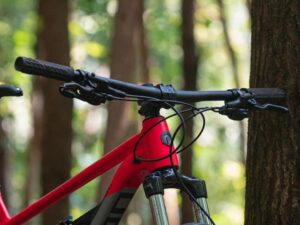
Before going further, it will be much better for you to know various kinds of bicycle handlebar grips for a mountain bike. The handlebar grip in mountain bikes usually comes with more cushioning to help riders reduce the impact on their palm and wrist during bike excursions.
In general, there are two types of mountain bike grip, they are:
Slip-On-Grips
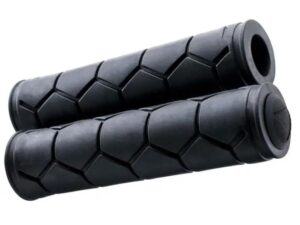
Also known as a push-on grip which is made of a soft pliable material such as rubber or silicone material that allow this type of grip to be easily installed on the handlebars. This type of handlebar has a smaller inner diameter so it will need some lubricant to install on the handlebar.
Since the slip-on grip is having a tight fit, you will have to measure the diameter of your handlebar so you can buy the right size grip because this type of grip isn’t adjustable. Slip-on grips are lighter in weight and cheaper in price. It also doesn’t require any tool to install. Some Polygon mountain bike handle grips are also made from this type of grips.
Lock-On-Grips
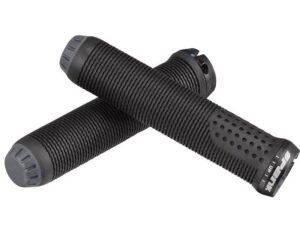
Lock-On grips have a collar locking system that keeps the grip in place when installed on the handlebars. Different from the slip-on grip, the lock-on grip doesn’t require a lubricant to be installed; rather, you will need an Allen wrench to properly tighten the ring and secure it in place.
Since a lock-on grip has metal rings, it tends to weigh a little bit more. For the price, a lock-on grips cost higher than the slip-on type. Anyways, if your bike frame is made of carbon fiber material, you will have to ensure not over tighten the lock-on grip so you won’t break the handlebar.
Tips to Change Mountain Bike Handlebar Grips
After knowing the different types of handlebar grips, it is time to get back to our main topic about how to put handlebar grips on a mountain bike. The tool you will need to prepare are:
- Mountain bike spray;
- Long and thin screwdriver;
- New grips;
- Non-residual agent;
- Allen wrench.
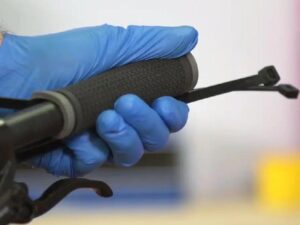
Before you start installing your new handle grip, you will have to remove your current one. There are multiple ways to do it but today we are going to tell you how to remove handlebar grips with air compressor:
- Prepare tire pumps with nozzles;
- Place the nozzle under the grip;
- Put the air compressor inside;
- Once the rubber grip has successfully inflated, take off the grip.
If you don’t have any compressor, you can substitute it with a blower as they work the same way. Or you can also spray some water or lubricate the surface of the handlebar using a bike lube to remove the handle grip. Once you have finished removing your old handlebar grip, you can start installing your newly bought grip. But for a more detailed version, you can refer to the followings:
How to Install the Slip-On Grips
Slip-on grips are not hard to install if you follow the guidelines:
- Properly remove the bar end plug so you can install the new handlebar grips;
- Insert the flat-headed screwdriver between the grip and the handlebar to create a gap;
- Once you have created a gap between the grip and handlebar, spray the inside or use rubber alcohol to clean the handlebar;
- Twist the grip and remove it;
- Once done, spray the inside again and makes sure it reaches inside the grip even when you have already applied lubricant;
- Twist again and keep on spraying until the grip comes off completely;
- After successfully removing the old grip, it’s time to spray the handlebar using a non-residual agent. Lubricant will ensure that there’s no residue from the old grip on the handlebars and allow the new grip to be installed without any kind of excessive friction;
- Once the handlebar is fully lubricated and clean, slide on the new grips;
- If the new bike grip is already set, let it sit there;
- Attach the bar end plugs back to the handlebar and repeat the process for the other side.
Remember that you have to install the grip before the sprays die away because it will be a hard task to get the grips installed without the lube. While the installation of a slip-on grip is not hard, you still have to ensure that you have carefully removed the old slip-on grips.
How to Install the Lock-On Grips
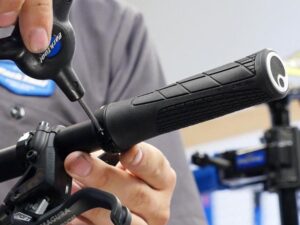
Installing lock-on grips is just as easy if you follow the steps thoroughly:
- Loosen the collar lock using an Allen key so you can replace your old grips with the new ones;
- Once the collar has loosened up, the old grips will come off in a blink;
- Slide the new grips in and loosen or tighten the collar locks to adjust;
- Use the Allen wrench to tighten the lock again and make sure everything is already set.
How to Install the Ergonomic Bike Grips
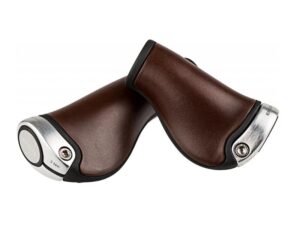
Since ergonomic bike grips seem to be very popular, here is how to install ergonomic bike grips for a bonus. Here is the guide we manage to get:
- Loosen the shift and brake levers;
- Clean the handlebar using a cloth dampened with alcohol;
- Once done, loosen the grip screws;
- Install the grips;
- Adjust the grip rotation;
- Tighten the grip screw using the torque wrench;
- Tighten the shifter and brake levers with a torque wrench;
- Mounting the handlebar plugs.
Conclusion
As we have said before, handlebar grips often overlooked or being ignored by most cyclists despite being one of the components that will bring a huge difference to your riding performance.
If you wonder about how often you should replace your handlebar grips, it will be different for each cyclist depending on how often they ride their bike and what kind of riding style or terrain they used to ride their bike on.
But one thing is certain, you should have changed your handlebar grips as soon as you see them worn out, damaged, or slipping from the handlebars. Besides, if you feel numbness on your palm, wrist, or fingers, that is also a sign for you to get your handlebar grips replaced.
We have talked about replacing the mountain bike handlebar grips, then how to put handlebar grips on a road bike? A road bike handlebar grips are usually protected with rubber tape. So instead of changing the grips, usually road bike owners will only replace the rubber tape by removing the old one and wrapping the new one in the clockwise direction.
Are you looking for a new mountain bike to ride on but at the same time need to make room for your savings? You might want to take a look at the Polygon mountain bike. The Polygon mountain bike is manufactured with the advanced ALX Alloy frame material which is guaranteed to be more lightweight and durable compared to any other bike in the industry.
The groupset and components used to build the Polygon bike are also from top-tier companies like Shimano and SRAM. The suspension used for their mountain bike is coming from either FOX or RockShox. The interesting part is, that despite offering high-quality components and materials, every Polygon bike is marketed with the most affordable pricing compared to most bikes on the same level.
If the bike has already captured your heart, you can visit their official distributor at Rodalink to get the original one. The plus point at Rodalink is, that you can purchase through their online store that is ready to be accessed 24/7.
Rodalink also comes with a wide range of bike selections from renowned brands and is guaranteed to be a well-performing one. So you don’t have to worry about not finding the perfect bike, because Rodalink has everything you are looking for.
New cyclists will not have to worry, the professional team at Rodalink will gladly assist you and find the best bike according to your preference and budgeting. You can also purchase the original parts, accessories, and apparels from Rodalink. Come visit their offline store at East Coast and Jurong East or if you don’t have enough time, you can visit Rodalink’s online store.