If you are looking to take your mountain biking skills to the next level, you are in luck! There are 7 skills that every beginner should learn before they get back on the bike.
1. Front Wheel Lift
Most people don’t remember the last time they practiced a front-wheel lift, which is unfortunate since these can be very helpful when riding on trails with obstacles like roots and rocks. With practice, jumping over this little stick will be a breeze. Once you’ve mastered that, maybe try taking it to the next level by practicing with speed bumps or curbs. When you do front wheel lifts, keeping your body in a nice neutral position is helpful—somewhat forward with the weight compressed into the fork and lifted up by that front wheel.
2. Rear Wheel Lift
After mastering the front wheel lift and taking some time on easier trails to practice, you’re ready to attempt a rear wheel lift. This technique will be helpful when approaching slippery rocks or other technical features that may cause your front wheel to slip or lose traction. To do this on a bike, you can set your body position, drop your heels and hop onto the pedals as with that front wheel. If you have clipless pedals, don’t forget to scoop them—otherwise, you’ll be jumping up and down on them!
3. Wheelie
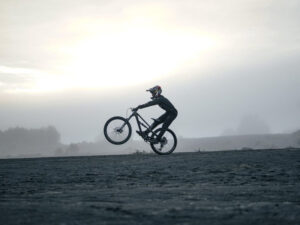
All riders might agree on this one, it looks cool to pop a wheelie! This move is really important when you’re out on the trail—seated and pedaling with your weight mostly over your rear tire. When practicing wheelies, remember to start in easy gear but not too easy. Keep your arms extended out in front of you and keep your chest open. Although you aren’t a wind master (someone who has mastered the art of riding without using their hands to balance), always keep your rear brake on when doing wheelies. That way, you can control how far back and forward you are going—and know if it’s time to stop as soon as things go sideways!
4. Skinnies

Riding wooden features on your mountain bike, also known as “skinnies”, requires balance and confidence. Stand on your pedals in a balanced position. This will allow you to keep balance better than if you are seated. Keep the weight of both feet evenly distributed, and keep the pedals level so that no leg muscles tire out too quickly during the ride. Eyes up, eyes down. You want to make sure you are on course by checking the skinny ahead of time before your wheels get lodged in it. Ride onto the skinny with momentum — speed is helpful when trying to balance!
For balance, move the bike side to side underneath you. To maintain balance while pedaling, pedal lightly and only when necessary—increased speed makes it harder for riders to stay upright in a straight line.
5. Track Stands

A track stand is when you come to a complete stop on your mountain bike and stay upright without unclipping or putting down your foot. This requires significant skill, but mastering this bike technique can greatly improve the overall appearance of one’s riding profile.
You can begin practicing by rolling forward at a slow, comfortable pace. As you do so: stand up in your saddle and stay tall and straight (without keeping one arm raised). Brake until you come to a complete stop—then turn your bars in order to find the point where balance naturally happens. In order to create a more stable platform, you can “apply pressure directly into your bars”. This will be much more effective than pushing your weight from side to side in an effort at balance instead of grinding on the handlebars like most people do when they lose their momentum and come crashing down onto them. Once you’ve found your standstill, push hard into the pedals to accelerate forward.
A little bonus pro tip: Before attempting a track stand, shift into a harder (higher) gear. This will add tension to the bike’s drivetrain, making it easier for you to find your balance.
6. Stoppie
A stoppie—where you brake with your front brake and allow the rear of the bike to come off the ground—is another example of how improving your overall balance on a bike can increase its performance. While the rear wheel is off the ground, you can allow it to turn left or right. Use your front wheel as a pivot point for this maneuver. You can use this technique for tight switchback corners, where you wouldn’t ordinarily be able to steer your bike and you don’t have enough speed to skill.
7. Cornering

The final skill you can improve to make yourself a better mountain biker is cornering. When approaching a corner, begin dropping your outside foot toward the pedal—this will help stabilize and reassure you on rough terrain. By lifting your inside foot when you dip the bike, you’ll clear any obstacles and lower your center of gravity for more traction. So, really try to open up the corners, and be smooth on your bike—especially when you’re braking. If you do have to brake—like coming down a hill—”feather” your brakes by applying them lightly before coming off that front tire for grip.
After reading this article, you’re ready to take your mountain biking skills to the next level! You can use mountain biking equipment to support your training so that you stay safe and comfortable.
If you live in Singapore and lately have been looking for a “bike shop or bike shop near me”, or are looking for a mountain bike and bike apparel—Rodalink provides quality selections from trusted brand names. There are many Rodalink promotions running at the moment. These include 0% OCBC installments and free delivery, as well as Shopback, Pay Later options. For more details on these promos visit their website now!
Not only that, joining Rodalink Singapore will give you many benefits. Come on! Let’s start this exciting cycling trip together!
Discover Your Cycling Needs at Rodalink Now!
Discover Your Needs at Rodalink Now!