Having noisy brakes that squeak during the ride is annoying and can somehow negatively affect your riding mood. If you want to get rid of this sound and enhance your confidence and speed during your mountain biking activities, then you will have to learn about how to adjust mountain bike disc brakes.
Since you are certain that your brakes will slow and stop your bike quickly, you gain more confidence when pedaling and rail corners and unseen terrain with an increasing speed. So, without further introduction, here is your guide on how to adjust hydraulic disc brands on a bike and mechanical disc brakes on your bike. Have an enjoyable reading.
What is Disc Brakes?
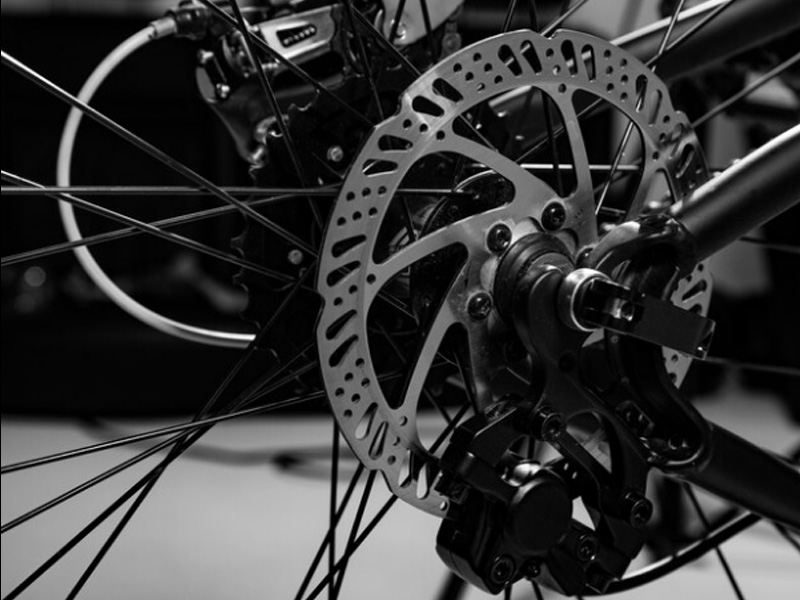
Back in the day, the disc brake was common for cars, motorcycles, and lorries. But as technology advances, you can also have a disc brake for your bike nowadays. Named after where the braking force is applied, a disc brakes force is transmitted through a disc that is bottled directly to the hub.
Some riders, especially mountain bikers, preferred disc brakes on their bike because it has a more powerful braking system and works well in every road condition. Besides, having disc brakes on your bike will allow your wheel to go all out without worrying it might rub the brake pads.
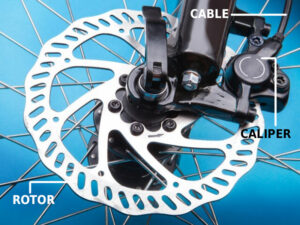
Generally, disc brakes are divided into two types: mechanical disc brakes and hydraulic disc brakes. The mechanical disc brakes system is operated by a cable while the hydraulic disc brakes system uses fluid to transfer force from the lever to the caliper.
Hydraulic disc brakes offer the best and most efficient braking performance among all types of brakes, but of course, it comes out a little bit more pricey than the other braking system too. If you are looking for a mountain bike with this hydraulic braking system that offers a competitive price, you may want to consider the Polygon mountain bike. Most Polygon mountain bikes are manufactured with hydraulic disc brakes yet still give an affordable price range.
Adjust Mountain Bike Disc Brakes
Regardless of what you are looking for, a tutorial on how to adjust mechanical disc brakes on a bike or its hydraulic counterparts, just know that both are a simple process to do if you know how the braking system works.
Diagnosing Noise
For the hydraulic braking system, the brake lever configuration on the handlebars comes with a reservoir for the hydraulic brake fluid which travels through the brake lines. The fluid will push through the lines to the calipers when riders are engaging with the brake lever.
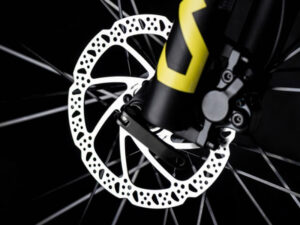
Since the caliper is housing pistons and brake pads, the fluid will push the pistons and the brake pads together. The pads will then squeeze the rotor and slow down your bike. After knowing how the braking system works, now it’s time to determine what caused your rotor to rub on the pads.
You can try to spin your bike’s wheel and look at the gap inside the brake caliper between the pad and rotor. If the rotor is constantly rubbing, you will have to realign the caliper, and if the disk has a distinctive bend or wobble that catches during the spin of the wheel, it indicates that you will have to straighten your disc.
Realign Caliper
To stop the brake from rubbing, you will need to realign the caliper, let’s break them down according to the types of disc brakes:
Aligning Mechanical Disc Brakes
First and foremost, let’s work on how to adjust cable disc brakes. To be fair, the cable disc brakes are less tricky to align and maintain compared to hydraulic brakes. But the downside is that they require almost constant maintenance so they can keep operating at their best.
To align single-piston mechanical disc brakes, you will need to prepare:
- Torque wrench with a set of Allen bits that usually comes in 4mm, 5mm, and 6mm sizes;
- A rubber band, and;
- A stiff card which you can reuse the old unused greeting cards or business cards.
If your tool is ready, let’s get into how to tighten bike disc brakes cable steps:
- Wind the barrel adjusters in;
- Retract the inboard fixed brake pad away from the rotor— the Shimano brakes usually use the Allen-headed bolt;
- Slightly loosen the bolts that hold the main body of the caliper to the frame/fork/adapter. Loosen it enough so you can slide the caliper around;
- Slide the caliper body around until the disc rotor passes through the center of the gap in the caliper;
- Carefully tighten back the caliper body bolts;
- Wind back the fixed pad towards the rotor until you can hear it gently touching the rotor as the wheel spins;
- Wind it back out in small increments until it runs silently;
- Slack the cable clamping bolt on the caliper arm;
- Place a piece of card between the outward brake pads and the disc rotor;
- Then use the rubber band to hold the caliper arm in the “on”. Remember that you are looking for a light actuation only;
- Pull the brake cable through the arm lightly and clamp it back down;
- Remove both the the the rubber band and the piece of card;
- Wind out the cable barrel adjuster until the bite point on the brake lever feels comfortable.
Align Hydraulic Disc Brakes
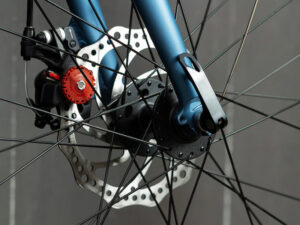
Usually, the hydraulic disc brakes are self-centering and don’t require periodic adjustment to the pads. However, it still requires a correct alignment to make sure the pads contact the disc brakes evenly without any rub. The step to align the hydraulic disc brake is similar to the mechanical disc brake.
The common how to tighten hydraulic disc brakes is to slacken the mounting bolt slightly, pull the brake lever hard while the caliper is free to move, and then tighten the bolts back up while the brake pads are firm against the rotor. However, this trick rarely results in accurate alignment hence it is not highly recommended to do. It is better to patiently align your brake’s caliper without any shortcut. You only have to do it once, after all.
As for now to adjust Shimano hydraulic disc brakes for the Shimano XTR, XT, Deore, and Saint alignment using an adaptor bracket are the following steps:
- Fully loosen the caliper mounting bolts for the bracket mounted caliper;
- Depress the brake lever to secure pads against the rotor and maintain pressure;
- Inspect the caliper and brake pad pistons, and push the caliper left or right until pistons appear centered over the rotor;
- Maintain pressure on the rotor and tighten the caliper mounting bolts;
- Release the lever and inspect this initial part alignment;
- If the wheel seems to slow when it is turned, readjust the pads by loosening the caliper mounting bolts to reposition the caliper;
- Fine-tune the pad alignment by fully loosening one mounting bolt while keeping the other bolt snug to allow you to push the caliper while pivoting off the snug bolt.
Straighten Rotors
Although disc rotors are designed to be very strong in the vertical planes, horizontal impacts can bend a rotor enough and cause it to rub. The primary cause of this often is a crash during the ride. Hence, straightening your rotors is the first rescue you can manage to do.
All you have to do is locate the points that rub while determining the direction it needs to be straightened so it can stop rubbing. Once you have successfully identified it, gently bend the rotor back and repeat the process until the rotor no longer rubs. But be careful to not bend it too far in the opposite direction and create more problems than necessary.
If you feel like straightening the rotor is no longer a possible task or you have completely changed a bit in a crash, do consider withdrawing some cash from your savings and purchasing a replacement.
Disc Brakes Lever Setup
Disc brakes lever setup is pretty simple and trivial but somehow, being overlooked and often not getting done correctly. A few parameters for optimal brake adjustment to the rider’s hands are the positions on the bars, the angle of the lever, and the lever reach. So, to get your disc brake lever setup perfectly done, you will have to:
- Determine the position of the brakes on the bars;
- Determine the whole positions of the rider on the bike;
- Adjusting the lever reach;
- Adjusting the bite point for higher-end models of brakes.
Conclusions

Regardless of the types of brakes, the bicycle disc brakes maintenance is mandatory to check and get adjusted once in a while especially after coming back from a ride on rougher terrain where bumps occasionally happen.
Getting your disc brakes adjusted correctly will not only boost your confidence during the ride and get rid of the noisy squeaking sound that affected your riding experience but also necessary to increase the safety system to support your ride over more technical terrain.
If you are looking for an awesome mountain bike with an amazing braking system and high-quality components, you will have to include a Polygon bike on your wish list. We have also mentioned how most Polygon bikes are built with hydraulic disc brakes yet offer a competitive price. They are a perfect to-go option when you want a well-performing bike that doesn’t hurt your budget by much.
You can also visit Rodalink to get the original bikes, accessories, parts, and apparels that will fully support your cycling journey and took it to another level of comfort within your prepared budget. Rodalink has a wide range of bike selections, so you don’t have to worry about finding the perfect bike that is made for you.
If you need adjustment of the brakes, handlebars, or just any components to get the ultimate comfort and make your ride more enjoyable, Rodalink also has a one-stop cycling store that will gladly assist you in modifying and maintaining your bike.
If you want to get the special price offer for maintenance and other purchase, you can do a free registration for becoming part of Rodalink community members. There will be lots of deals and events you can join exclusively. Your purchase can also be converted into a redeemable point. As a member of the community, the more you spend, the more beneficial it will be. Come and visit Rodalink now and get your dream bike in a few clicks only.